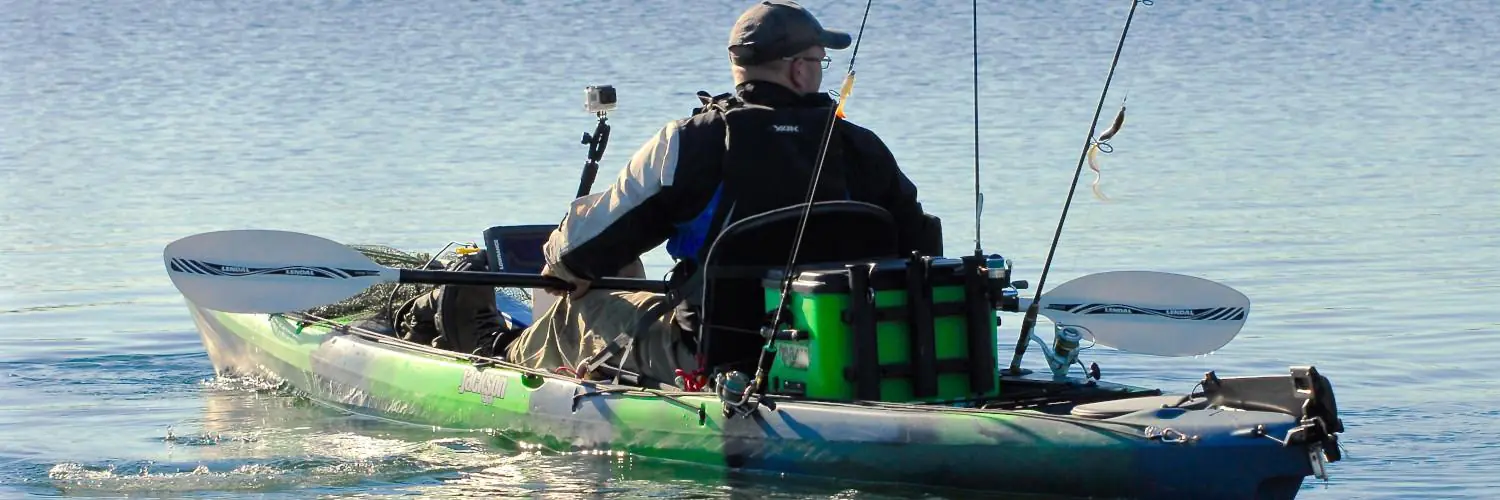
Kayak fishing has become increasingly popular, and a fish finder can greatly enhance the experience. Setting up a fish finder on a fishing kayak requires careful consideration of placement and power sources.
The ideal location for a kayak fish finder is one that’s easy to see but doesn’t interfere with paddling or fishing activities. Many anglers mount their devices near the cockpit for easy viewing while on the water. Power is typically provided by a 10 amp hour sealed lead acid or lithium ion battery, with lithium ion being lighter but more expensive.
A well-set-up fish finder can help locate fish underwater by using sonar technology. It creates a visual display of the underwater environment, making it easier for kayak anglers to find productive fishing spots. When combined with the right fishing rod setup, a fish finder can significantly improve the chances of a successful day on the water.
Table of Contents
Selecting the Right Fish Finder for Your Kayak
Choosing a fish finder for your kayak involves balancing technology and practicality. The right device can greatly improve your fishing success while fitting seamlessly into your kayak setup.
Understanding Different Fish Finder Technologies
Fish finders use sonar technology to detect underwater objects. CHIRP sonar sends out a range of frequencies, providing clearer images and better target separation. Some units offer down imaging for a detailed view beneath your kayak.
Side imaging scans a wider area, useful for locating fish and structures to the sides. GPS-enabled fish finders help with navigation and marking productive fishing spots.
Display units vary in size and resolution. Larger screens are easier to read but may be harder to mount on a kayak. Color displays offer better visibility in bright sunlight.
Balancing Functionality and Portability
Kayak anglers need compact, waterproof fish finders that don’t compromise on features. Look for units with good battery life and easy installation options.
Brands like Garmin and Humminbird offer portable models designed for kayaks. These often come with transom-mount transducers and simple mounting systems.
Consider units with wireless capabilities. They can connect to your smartphone, reducing clutter on your kayak.
Versatility is key. Choose a fish finder that can adapt to different fishing styles and environments. Some models allow for easy transfer between kayaks or even to larger boats.
Installation and Mounting Options
Proper installation and mounting of a fish finder are crucial for its performance and your kayak’s functionality. The right setup ensures easy viewing and operation while keeping the device safe and secure.
Choosing the Right Mounting Location
The ideal mounting spot for a fish finder should be within easy reach and view. Common locations include:
- In front of the seat
- On the side of the cockpit
- Near the bow
Consider the kayak’s design and your fishing style. Ensure the chosen spot doesn’t interfere with paddling or casting.
The transducer placement is equally important. It needs to be in the water, usually on the hull or transom. Some kayaks have built-in transducer scuppers for easy installation.
Always test the fish finder’s readability in different light conditions before permanent installation.
DIY vs. Pre-made Mounting Solutions
DIY mounting options offer flexibility and cost savings. Popular DIY methods include:
- PVC pipe mounts
- Wooden or plastic cutting board bases
- Ram mounts adapted for kayaks
These solutions allow customization to fit specific kayak models and personal preferences.
Pre-made mounts are designed for easy installation and secure fit. They often come with:
- Adjustable arms
- Quick-release mechanisms
- Waterproof connections
While more expensive, pre-made mounts save time and ensure compatibility with your fish finder model.
Some brands offer kayak-specific mounting kits that integrate seamlessly with their fish finders.
Power Sources and Battery Life
Setting up a fish finder on your kayak requires the right equipment. Two key aspects are choosing how to mount the device and picking a suitable transducer.
Battery Options for Kayak Fish Finders
Fish finders usually run on 12-volt batteries. The most common types are:
- Sealed lead acid (SLA) batteries
- Lithium-ion (Li-ion) batteries
SLA batteries are affordable and work well with most fish finders. However, they are heavier than Li-ion batteries.
On the other hand, Li-ion batteries are lighter and more compact. They also last longer and charge faster. But they are more expensive.
Some anglers use solar panels or power banks to extend their battery life. These can be handy for longer fishing trips or multi-day adventures.
Maximizing Battery Life on the Water
To make the most of your battery, consider the following tips:
- Turn off the fish finder when not in use
- Adjust the screen brightness to a lower setting
- Use a power-saving mode if your fish finder has one
Always check your battery’s charge before heading out. Bring a spare battery if you plan to fish for several hours.
Essential Gear for Kayak Fish Finder Setup
Setting up a fish finder on your kayak requires the right equipment. Two key aspects are choosing how to mount the device and picking a suitable transducer.
Mounting Options for Kayak Anglers
Kayak anglers have several choices for mounting fish finders. Gear tracks offer a flexible solution. These rails attach to the kayak and let you slide mounts along them. Ball mounts are popular for their adjustability. They allow you to turn and tilt the screen easily.
Some kayaks come with built-in mounts. These save space and look cleaner. Scotty makes a 1.5″ ball mount that works well for bigger fish finders. It clamps tightly but still moves smoothly.
When picking a spot, think about where you can see the screen while paddling and fishing. Test the location before drilling any holes. Make sure it doesn’t get in the way of your paddle strokes or fishing gear.
Selecting a Proper Transducer
The transducer is crucial for your fish finder’s performance. It sends and receives signals underwater. For kayaks, you need a compact, tough transducer.
Through-hull transducers work well but need a hole in your kayak. Transom-mount options attach to the back and are easier to install. Some transducers stick on inside the hull. These are simple to set up but may not work as well.
Pick a transducer that matches your fish finder model. Consider the waters you fish in. Deeper areas need stronger signals. Look for transducers with features like CHIRP technology for better images.
Make sure the cable is long enough to reach your fish finder. Keep it out of the way to avoid tangles. Use cable ties or clips to secure it neatly along your kayak.
Installing Your Fish Finder on a Kayak
Setting up a fish finder on your kayak takes some planning and care. The key steps are finding the right spot for the transducer and hooking up the display to power.
Determining Optimal Transducer Placement
The transducer is the heart of your fish finder system. It needs a spot where it can scan the water clearly. On most kayaks, the best place is on the hull near the stern.
Look for a flat area with no obstructions. Make sure it’s below the waterline when you’re seated. Some kayaks have built-in transducer mounts. If yours doesn’t, you may need to add one.
Test different spots before mounting. Put the transducer in a plastic bag with water. Hold it against the hull in various spots. Check the readings on your display to find the clearest signal.
Connecting the Display Unit to the Power Source
Your fish finder’s display needs power to work. Most units use a 12-volt battery. You’ll want to keep this dry and secure.
Pick a spot that’s easy to reach but out of the way. Many anglers use the front hatch or a waterproof box. Run the power cable to your display mount. Make sure it won’t get in your way while fishing.
Use zip ties or clips to keep cables tidy. Seal any holes you drill with marine-grade sealant. This stops water from getting in. Double-check all connections before heading out on the water.
Maximizing Your Fish Finder’s Capabilities
A fish finder can do much more than just locate fish. It can help you navigate and understand the underwater world. Learning to use all its features will make you a better angler.
Navigating with Waypoints and Routes
Waypoints are key for successful fishing trips. Mark spots where you catch fish or see interesting underwater features. Use your fish finder’s GPS to save these locations. You can then easily return to them on future trips.
Create routes between waypoints to plan efficient fishing paths. This helps you cover more water and hit your best spots. Many fish finders let you share waypoints with friends. This is great for group trips or introducing others to good fishing areas.
Remember to update your waypoints regularly. Fish move with seasons and changing conditions. Keep your marks current for the best results.
Reading and Interpreting Sonar Data
Sonar is the heart of your fish finder. It shows you what’s under your kayak. Learn to identify different objects on your display. Fish often appear as arches or lines. The bottom shows up as a solid line.
Pay attention to depth changes and underwater structures. These areas often hold fish. Look for drop-offs, ledges, and submerged trees. Fish like to hang out near these spots.
Water temperature is also important. Many fish finders show this info. Use it to find the right conditions for your target species. Adjust your fishing depth based on what you see on the screen.
Practice interpreting sonar images in different settings. This skill improves with time and experience. Soon, you’ll be reading the underwater environment like a pro.
Advanced Fish Finder Features for Kayak Anglers
Modern fish finders offer powerful tools to boost kayak fishing success. Two key technologies stand out for their ability to help anglers locate and catch more fish.
Exploring CHIRP Sonar Advantages
CHIRP sonar sends out a range of frequencies to create detailed underwater images. This gives kayak anglers a clearer view of fish, structure, and bottom contours.
CHIRP provides better target separation, showing individual fish even in tight schools. It works well in both shallow and deep water. Many CHIRP units offer split-screen views to compare different frequency ranges.
Some CHIRP fish finders made for kayaks have compact displays that are easy to mount. They often include GPS for mapping favorite fishing spots. Battery life is a key factor to consider when choosing a CHIRP unit for kayak use.
Utilizing Forward-Facing Sonar For Precision
Forward-facing sonar lets anglers see fish and structure in real-time, ahead of the kayak. This is especially useful for bass fishing and targeting other predator species.
The live view helps with accurate lure placement. Anglers can watch how fish react to different presentations. Some units show fish swimming in 3D, making it easier to judge depth and distance.
Setup is crucial for forward-facing sonar on kayaks. The transducer needs a clear view ahead without interference. Many kayak anglers use adjustable mounts to fine-tune the sonar angle.
Battery management is important, as these systems use more power than traditional sonar. But for many, the improved catch rates make the extra effort worthwhile.


