Draining water from a kayak without a drain plug is a common challenge for many paddlers. While some kayaks come equipped with built-in drainage systems, others require manual techniques to remove excess water.
To drain a kayak without a plug, tilt it on its side and let gravity do the work.
This method works for both sit-on-top and sit-in kayaks. For sit-on-top models, water typically flows out through scupper holes. Sit-in kayaks may need extra steps, like using a sponge or pump to remove water from the cockpit.
Proper draining keeps kayaks safe and comfortable during paddling adventures.
Kayak design plays a big role in how easy it is to remove water. Some kayaks have special features that make draining simpler.
Learning to drain a kayak quickly and well is an important skill for all paddlers. It helps keep gear dry and makes the kayaking experience more fun.
Table of Contents
Understanding Your Kayak’s Design
Kayaks come in two main types: sit-on-top and sit-in. Each has unique features that affect how water drains from them. Let’s look at the key parts of both designs.
Anatomy of Sit-On-Top Kayaks
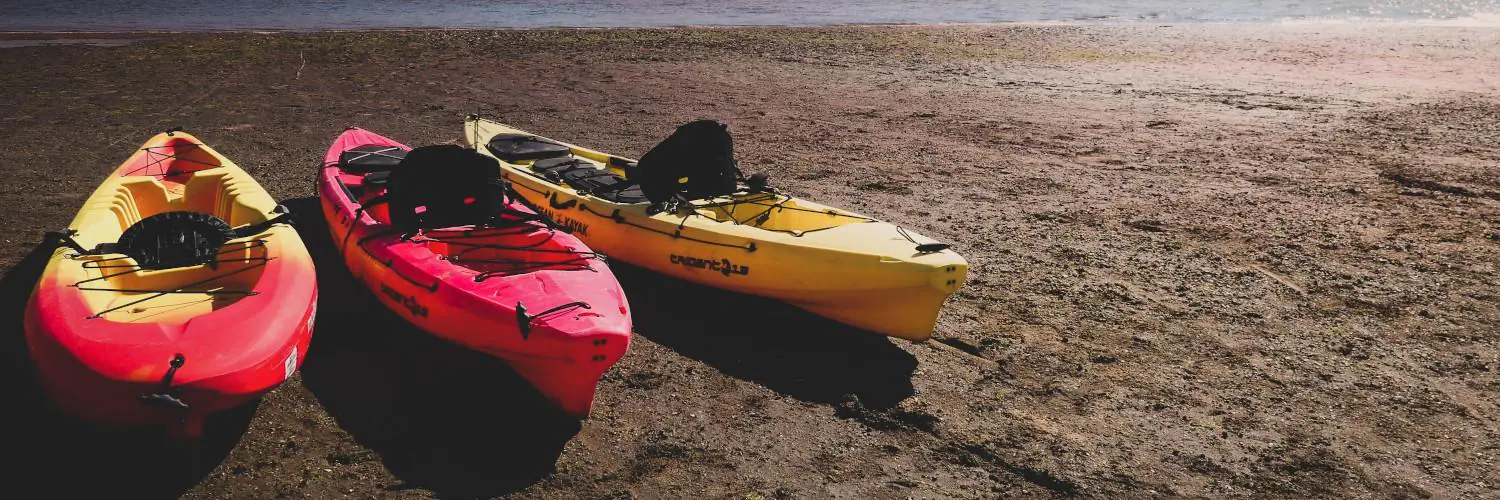
Sit-on-top kayaks have an open deck. This means you sit on top of the kayak rather than inside it. The most important feature for draining is scupper holes. These are small holes that go through the kayak from top to bottom.
Scupper holes let water drain out naturally. They’re usually found near the seat and in foot areas. Some kayaks have plugs for these holes. You can remove the plugs to let water out faster.
The deck of a sit-on-top kayak is often textured. This helps water flow towards the scupper holes. Many also have a slight slope to guide water to the back of the kayak.
Anatomy of Sit-In Kayaks
Sit-in kayaks have an enclosed cockpit. You sit inside the kayak, with your lower body covered. This design keeps you drier but can trap water inside.
Most sit-in kayaks don’t have scupper holes. Instead, they rely on other methods to stay dry. A spray skirt is a common accessory. It’s a flexible cover that fits around your waist and the cockpit rim.
Sit-in kayaks often have bulkheads. These are walls inside the kayak that create separate compartments. They add buoyancy and limit how much water can enter the kayak.
Some sit-in kayaks have small drain plugs at the rear. These let you empty water after your trip. Not all models have this feature, though.
Before You Begin: Safety and Preparation
Draining a kayak without a drain plug requires careful planning and the right tools. Safety comes first, so inspecting your kayak for damage is crucial. Gathering the right equipment will make the process smoother and more effective.
Inspecting for Leaks
Check your kayak for cracks, holes, or weak spots. Look closely at seams and joints where water might enter. Run your hands over the hull to feel for rough patches or bumps.
Small leaks can often be fixed with waterproof tape or sealant.
If you find major damage, don’t go out on the water. Get your kayak repaired by a professional. Regular checks help prevent surprise leaks during your trip.
Gathering Necessary Tools
Get the right tools ready before you start. A large sponge is great for soaking up water. A bilge pump can remove water quickly. Bring a bucket or container to catch water as you drain it.
Wear gloves to keep your hands dry and clean. Pack some towels to wipe down surfaces. A small tarp can be useful for placing under the kayak while you work.
Keep your tools in a dry bag when not in use. This keeps them ready and prevents them from getting wet or lost.
Manual Draining Techniques
Getting water out of your kayak without a drain plug takes some effort. These methods work well to remove water and keep you dry while kayaking.
Using a Sponge for Water Removal
A large sponge is a simple but effective tool for draining a kayak. Dip the sponge into pooled water inside the kayak and squeeze it out over the side.
Repeat this process until most of the water is gone. Focus on low spots where water collects.
A sponge works best for small amounts of water. It’s slow but thorough.
For faster results, use a large sponge or multiple smaller ones. Synthetic sponges soak up more water than natural ones. Keep spare sponges in a dry bag for emergencies.
Tilt and Drain Method
The tilt and drain technique uses gravity to remove water. Flip the kayak on its side or upside down on land. Let water flow out naturally. Rock the kayak gently to help water move.
For stubborn water pockets, lift one end of the kayak. This shifts water to the lower end for easier draining. Be careful when tilting a heavy, water-filled kayak. Ask for help if needed.
This method works well after paddling. It gets most water out quickly. Combine it with sponging for best results.
Utility and Storage Considerations
Proper storage and maintenance are key for keeping your kayak in top shape. These steps help extend its life and make future trips more enjoyable.
Storing Your Kayak Post-Drainage
After draining your kayak, store it in a cool, dry place. Keep it off the ground using padded supports. This prevents warping and damage.
For sit-on-top kayaks, store them upside down on padded bars. Place the bars about 1/3 of the kayak’s length from each end. This spreads out the weight evenly.
Sit-inside kayaks can be stored on their side or upright. Use foam blocks or straps to hold them in place. Make sure all hatches are open to let air flow through.
If you must store your kayak outside, use a cover. This protects it from sun and rain. Avoid leaving it in direct sunlight for long periods.
Kayak Maintenance Tips
Clean your kayak after each use. Rinse it with fresh water to remove salt, sand, and dirt. Use mild soap for tough stains. Dry it fully before storing.
Check for scratches or cracks often. Small issues can turn into big problems if left alone. Fix any damage right away to keep your kayak safe and watertight.
Lubricate moving parts like rudders and foot pegs. This keeps them working smoothly. Use a silicone-based spray for best results.
Inspect your kayak’s safety gear regularly. Replace worn-out items like throw ropes or first aid kits. Keep life jackets clean and in good condition.
For fishing kayaks, clean rod holders and tackle storage areas. Remove any leftover bait or fish scales. This prevents odors and keeps your gear fresh.
Alternatives to the Missing Drain Plug
No drain plug? Don’t worry. There are clever ways to get water out of your kayak without one. Let’s look at some handy solutions.
DIY Drain Plug Solutions
A simple cork can work as a makeshift drain plug. Pick one that fits snugly in the drain hole. Push it in firmly to create a watertight seal.
Another option is using a rubber stopper from a hardware store. These come in various sizes and can be a good fit for many kayaks.
For a more lasting fix, try moldable epoxy putty. It can shape to fit the drain hole perfectly. Let it harden, and you’ve got a custom plug.
Some paddlers use a small bolt with a washer and wing nut. This creates an adjustable plug that’s easy to remove when needed.
Always test your DIY plug before heading out on the water. Make sure it’s secure and doesn’t let water in.
Using Scupper Plugs for Sit-On-Top Kayaks
Sit-on-top kayaks often have scupper holes for draining. These holes can let water in during paddling.
Scupper plugs are designed to block these holes. Many scupper plugs are universal and fit different kayak models.
They’re usually made of rubber or plastic. To use them, simply push them into the scupper holes. Make sure they’re tight enough to keep water out.
Some kayakers prefer to leave front scupper holes open for drainage. They only plug the rear holes to stay dry.
This balance can work well in calm waters. Remove all plugs in rough conditions to let water drain quickly.
Remember, scupper plugs are removable. Take them out to drain collected water when needed.

